Innovative design studio Nervous System, which our readers may remember from its stunning 3D printed kinematics dresses, has recently ventured into the realm of 3D printed ceramics by experimenting with Tethon 3D’s new material called Porcelite. In a blog post about the process of 3D printing with porcelain, Jessica Rozencrantz, one of Nervous System’s founders, outlines the challenges she faced and solutions she found while printing with the new material:
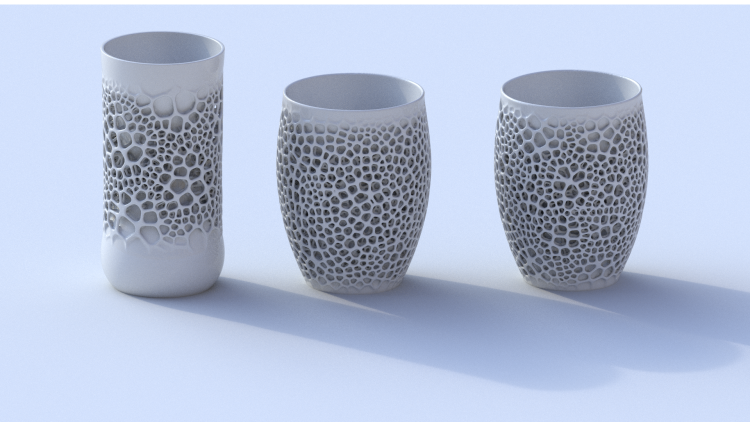
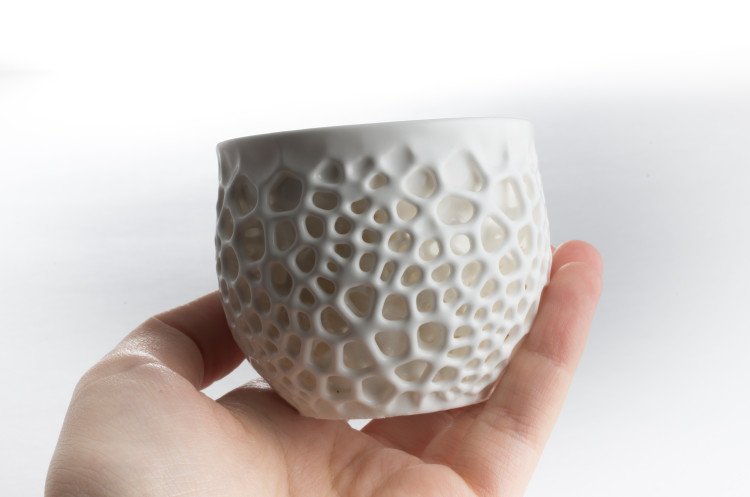
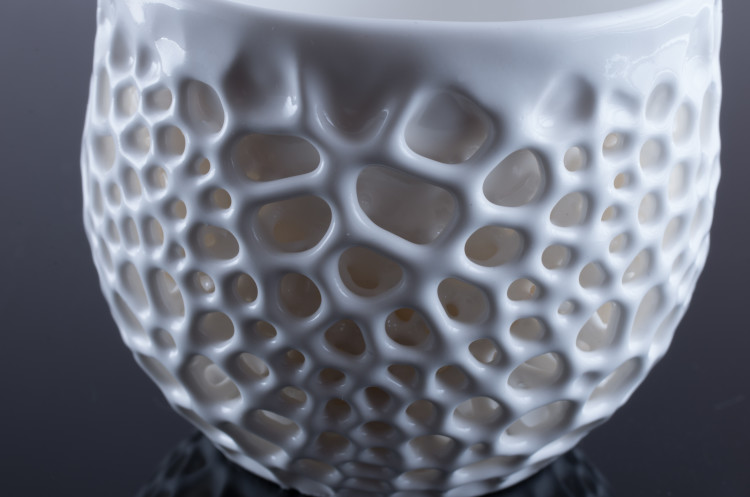
”This winter, we found out about a kickstarter for new 3D-printable ceramic called Porcelite by Tethon3D. Though we are often skeptical of kickstarters, especially in the 3D printing space, we jumped at the opportunity to start experimenting with this material. We have always loved ceramic as a material and were excited by the prospect of creating 3D-printed ceramic pieces. (In fact, our one and only foray into traditional mass production was making a line of ceramic cups and plates). Our first designs for this new material are porcelain cups that remain cool to the touch due to the intricate, cellular nature of their surface. It took us over a month of experimentation to figure out how to properly print the material, and below we discuss some of its challenges and potentials.
3D printing ceramics
This is not the first method to make 3D-printed ceramics. In fact, many people have devised ways to do so. The two most common are extrusion-based printing and powder printing. We first saw extruded ceramics through the project L’artisan Electronique by Unfold. We also worked with a startup called Figulo (now Imergio) in 2010, printing ceramics on a converted ZCorp machine. Shapeways offers “3D-printed” ceramics by printing a mold and using traditional slip casting. However, Porcelite is the first method I am aware of that can print ceramics using Stereolithography, SLA (edit: there are other high end SLA ceramics, but nothing accessible at a consumer level).
This piqued our interest for a number of reasons. The aforementioned 3D-printed methods have a number of constraints and limitations that make it difficult to explore the types of forms we design. Extrusion printing cannot stop and start well, limiting it to coiled forms. Powder printing has a fragile green state before firing and coarse texture that prevents working with intricacy and detail. SLA is one of the smoothest and most detailed 3D printing methods, allowing us to more freely explore the sort of design that excites us: complex, intricate parts that can’t be produced by traditional methods. Additionally, we have Formlabs printers in our studio, so it is something we can experiment with in house.
The main downside is size. The print volume is not very large and must accommodate supports and material shrinkage, leading a maximum height of a little over 5 inches.
Designing a Cellular Cup
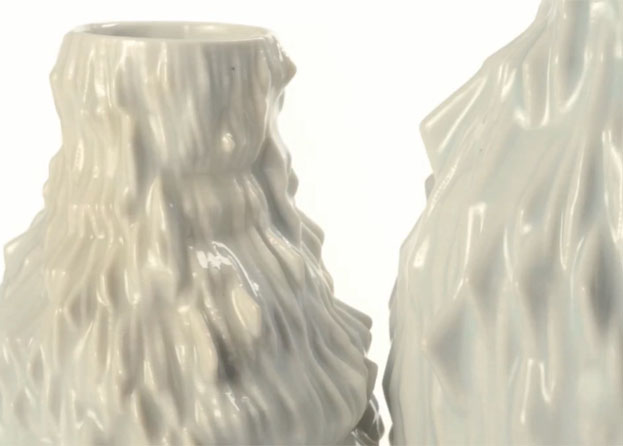
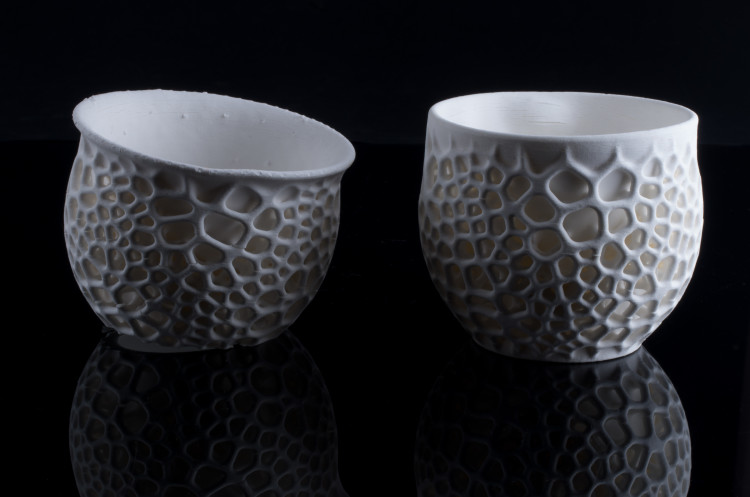
We wanted to explore ceramic designs that really required the use of 3D printing and would be nearly impossible to make any other way, even by hand. We were also interested in playing with the idea of double-walled chambers or heat sinks for insulating properties. Our previous cups had played with the same idea using ribbed surface textures, but were quite limited due to the constraints of casting.
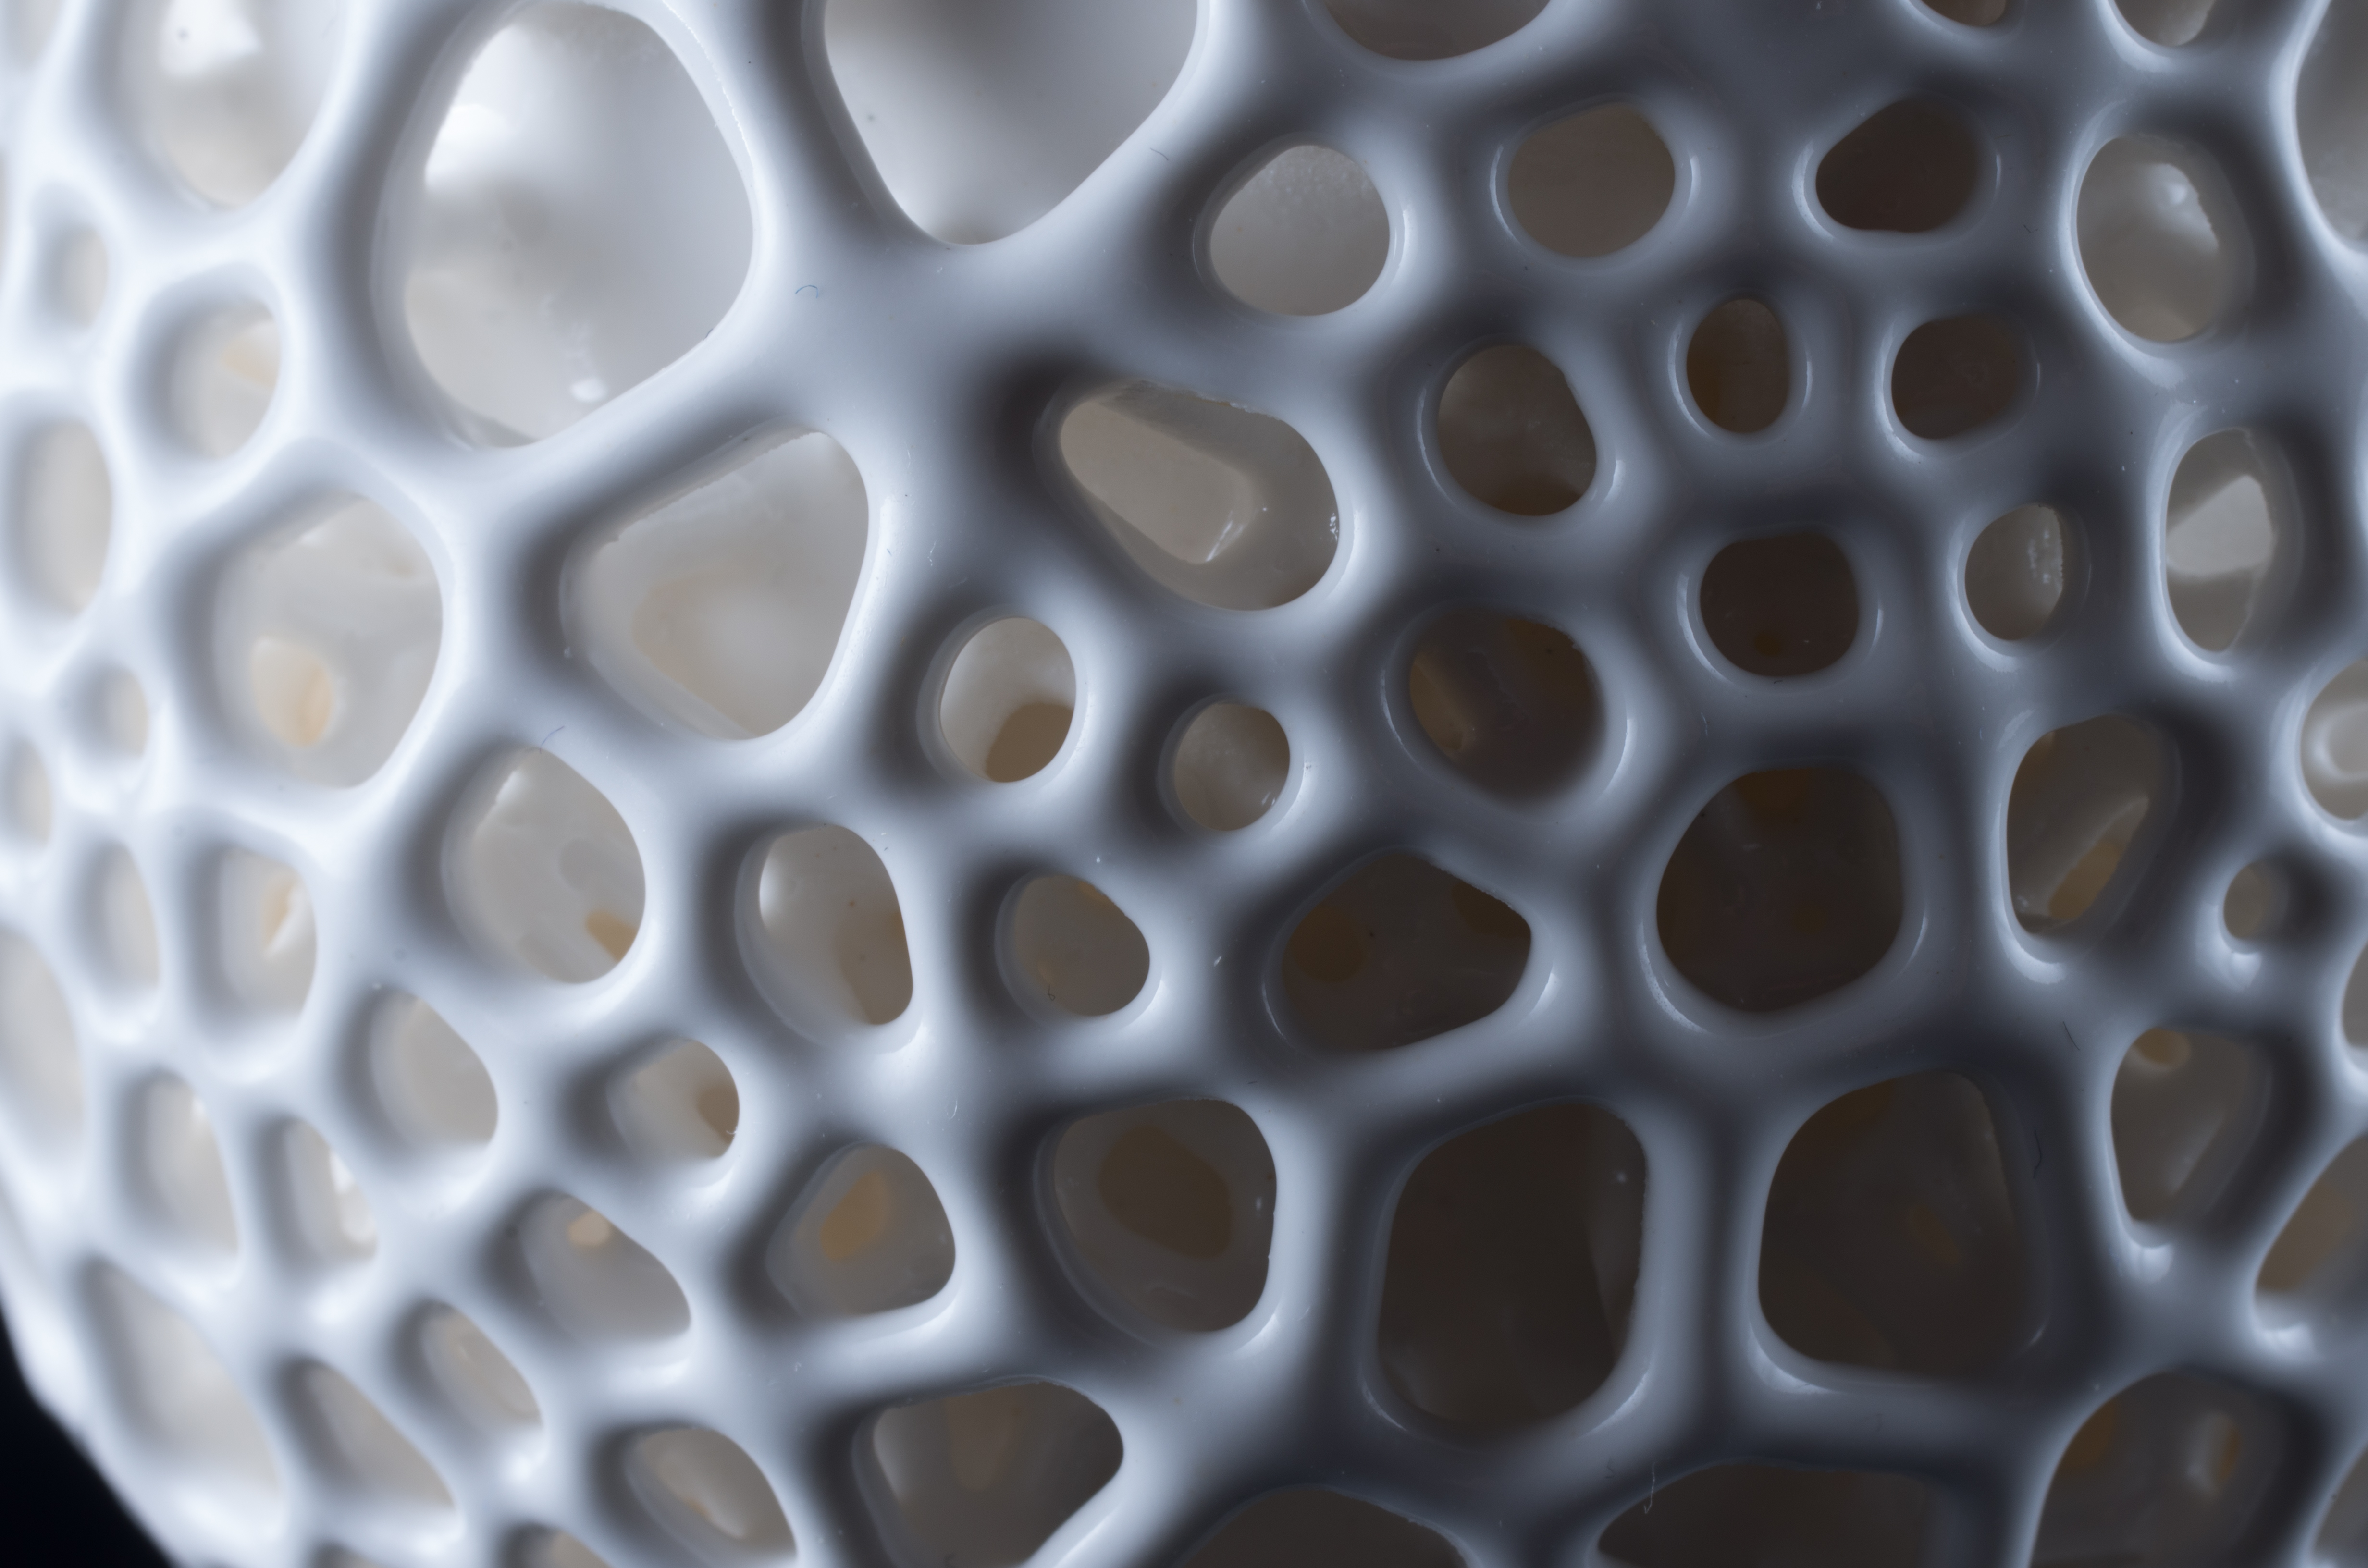
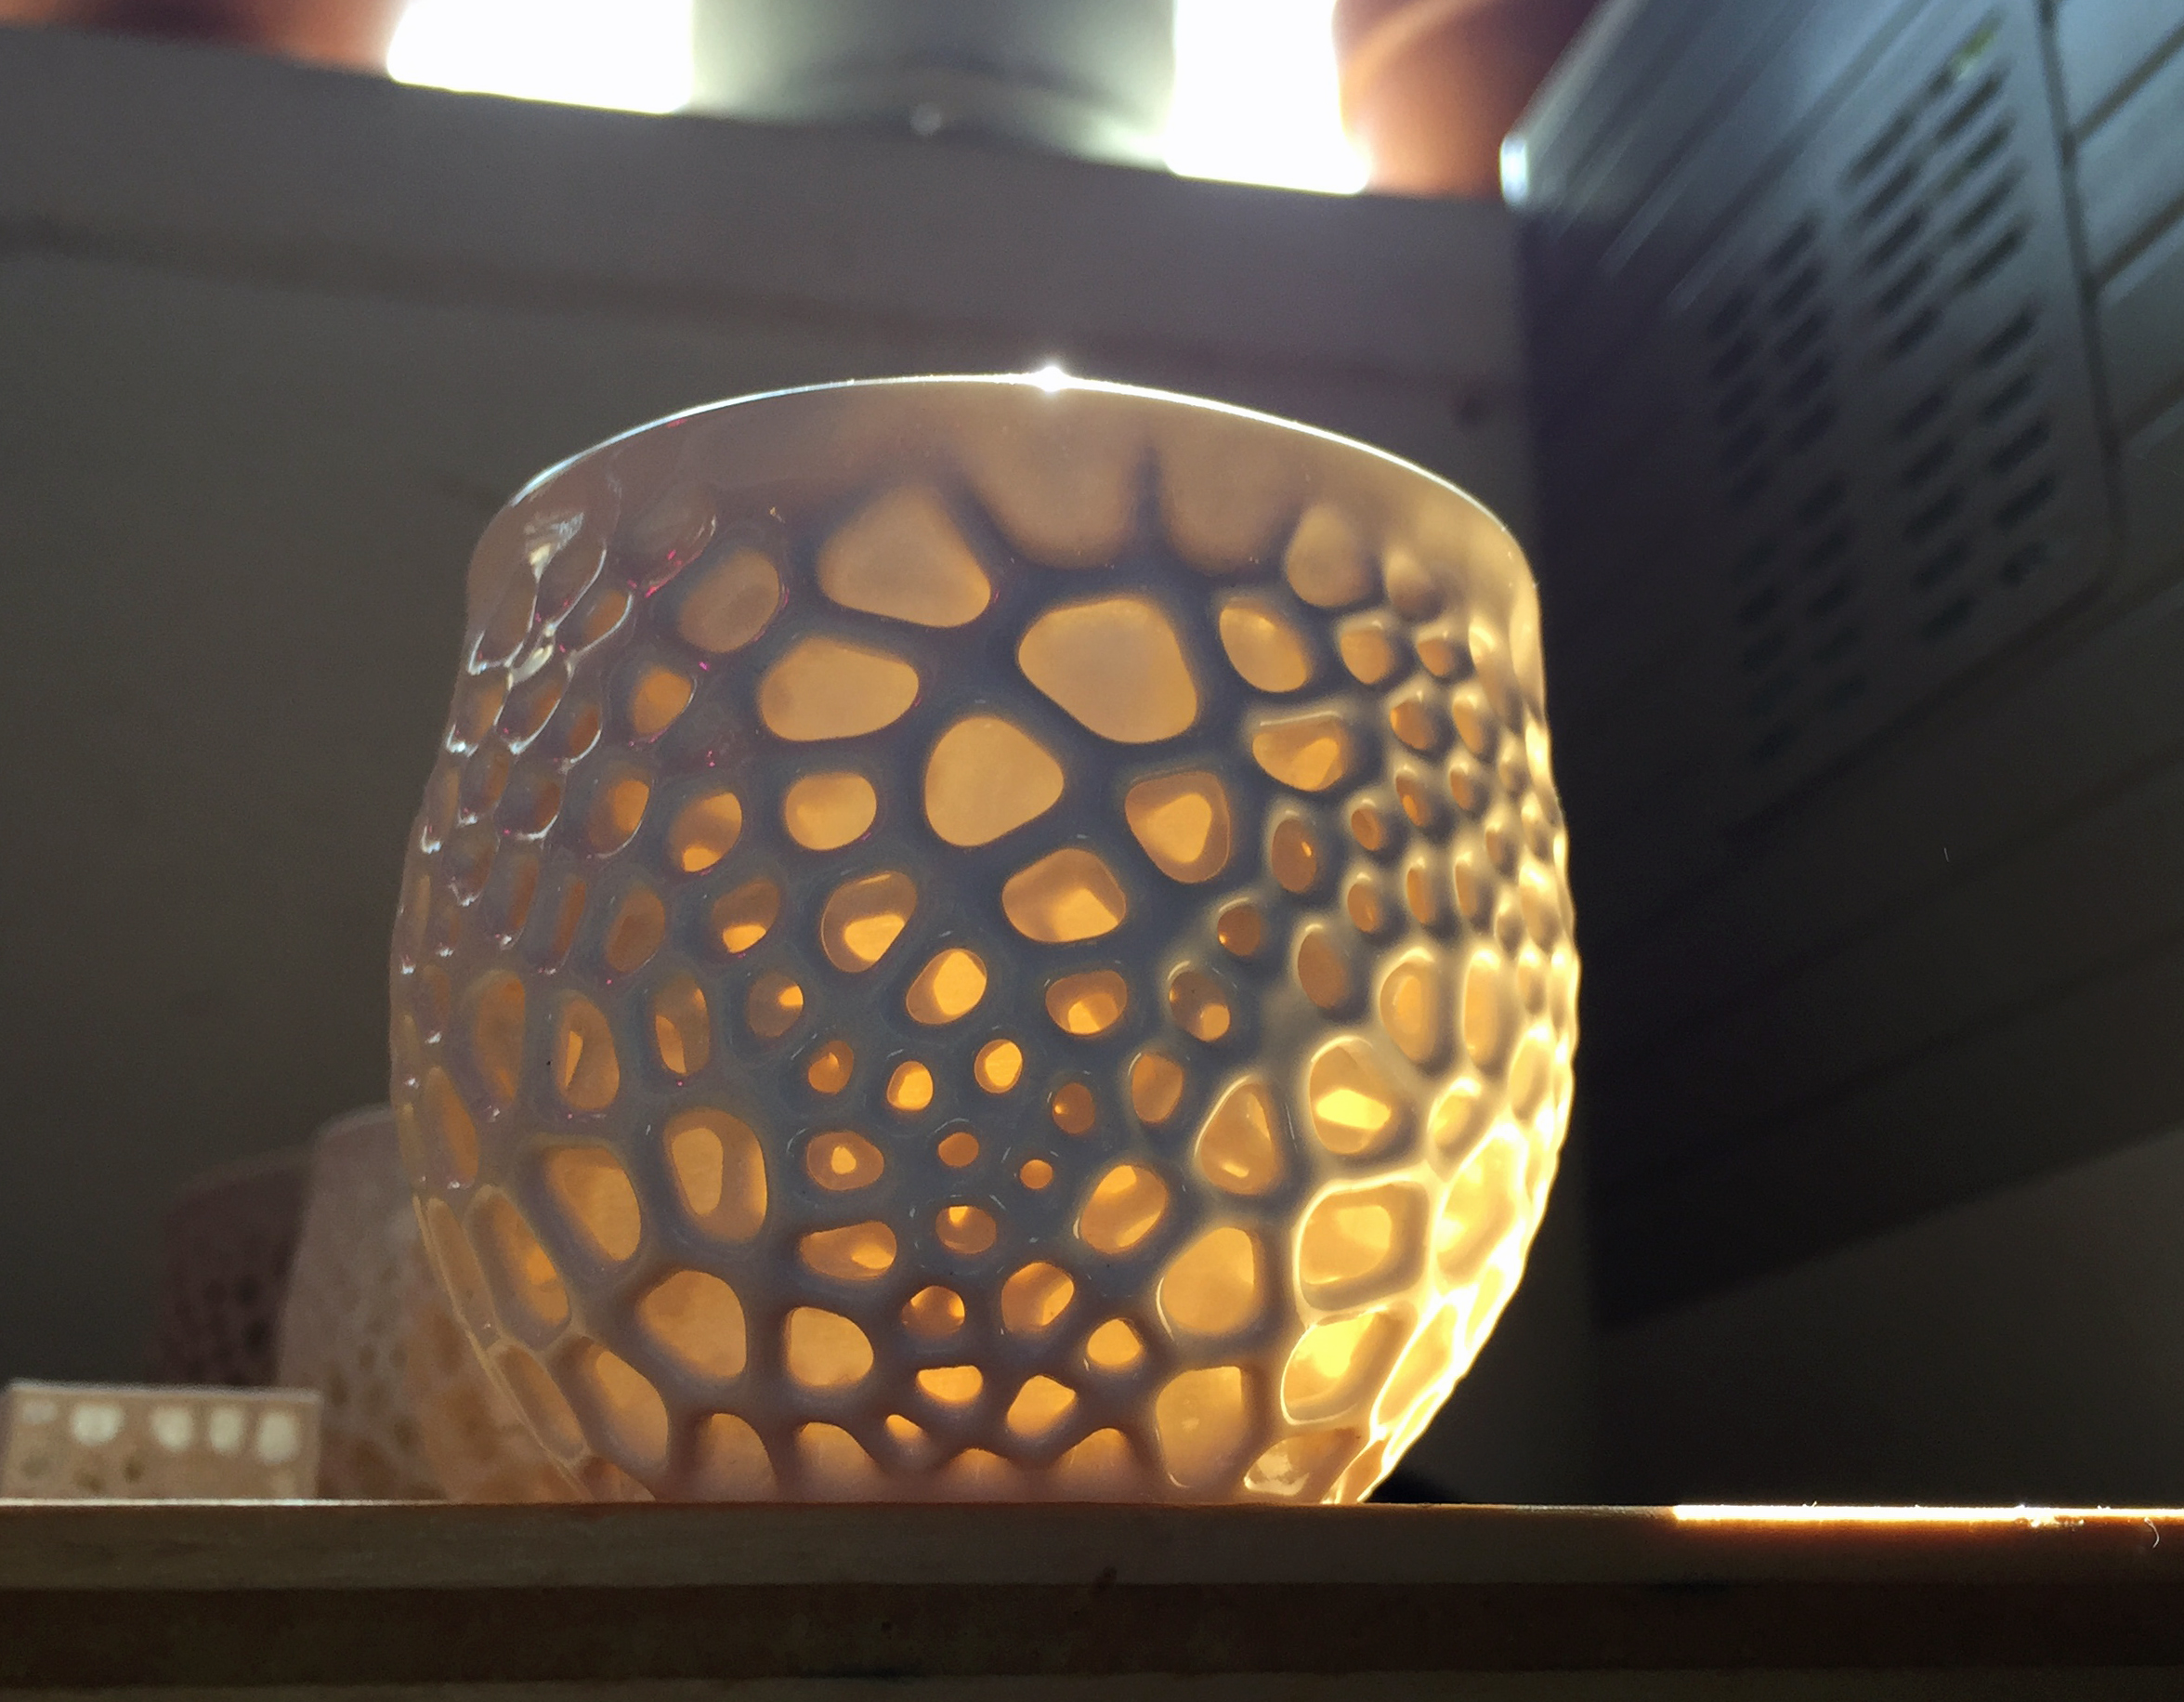
We designed a series of cups surrounded by intricate cellular networks. These airy structures remain comfortable to touch even when the cup holds hot liquids. Each cup looks as though it’s sheathed in a frozen foam of bubbles. These shapes are not only be beautiful and functional, but are also self-supporting for the printing and firing processes. (This builds upon some of the techniques we first explored last year with New Balance for 3D-printed shoes.)
Prototyping and troubleshooting
This material is still new and experimental, so during the prototyping process we had a number problems and setbacks. We can divide these issues into printing and post processing (firing and glazing). First off, the print quality of the material is quite good. The surfaces are smooth, the parts are strong, and overhangs work well. One of the main problems with the material is separation. The material is essentially a photopolymer mixed with fine ceramic powder, and these two components easily separate when undisturbed. Noticeable separation can start in under an hour. For a 10-20 hour print, that can be quite problematic.
Settings
Because of the separation, we wanted to use the wiper on the Form 2 to add some agitation and mix each layer. However, the Open Mode that Formlabs has for using experimental materials disables the wiper. To get around this, we use an empty cartridge to spoof a normal Formlabs material, instead of using Open Mode. Because we use an empty cartridge, we have to manually add resin for long prints. Though Tethon recommends using the settings for Grey or Black material, we are currently using the settings for Flexible V2. All our prints so far have used 50 micron layer height.
Build adhesion
Our biggest problems have been with the print falling off during printing both from the build plate and the supports. The material is much heavier and more brittle than normal Formlabs materials. We used a rough sandpaper to add a coarse texture to the build plate to aid in adhesion. We also used the “Fine Tuning” settings to lower the starting position by 0.2mm.
We have also had to use fairly large supports. We have been using supports with a contact size of 0.9-1.2mm because of issues with prints breaking off the supports for long jobs. Luckily, the ease with which supports break means they are also significantly easier to remove after printing compared to other materials.
Firing
After printing, the pieces are fired in a kiln just like normal ceramics. When fired, all the resin burns out and the ceramic goes through vitrification, forming solid porcelain. This causes the part to shrink around 17.5%. All ceramic shrinks when fired, but normally around 12%, so this is a bit high. The shrinking causes stress in the material while firing, which can lead to cracks forming, depending on the geometry. This is true of all ceramics, but even more so in Porcelite. We especially notice cracks forming along layer lines. Also as with all ceramics, parts will slump in the kiln causing unsupported areas to fall or bow.
We have also had problems bubbles forming during firings. This happens when the resin is burned out and turns into gas. Tethon recently posted a new firing schedule (how the temperature changes in the kiln) which addresses most of that issue, though we have found it isn’t completely gone. We post cure the prints in a UV oven for around 2 hours before firing, which also seems to help slightly with the bubble formation. We fire in a small desktop kiln in our spray booth to ventilate the burned off resin.