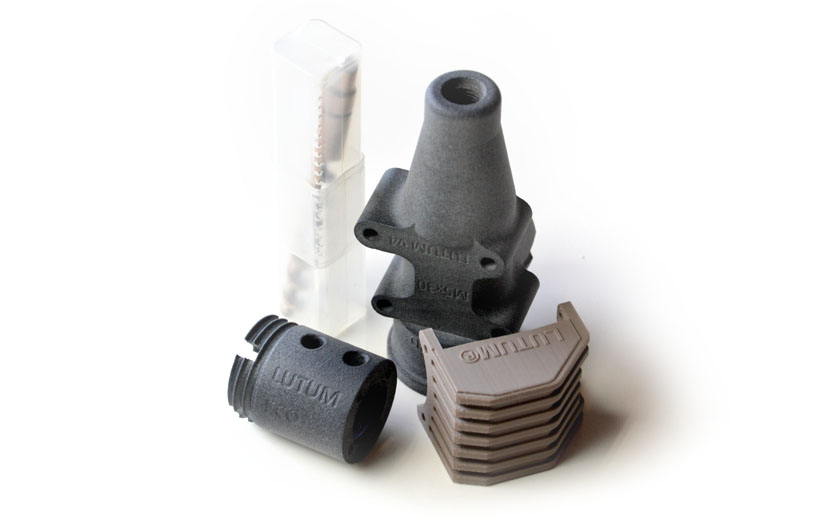
The eco extruder DIY kit.
You unpacked the parts and have run into trouble assembling the extruder.
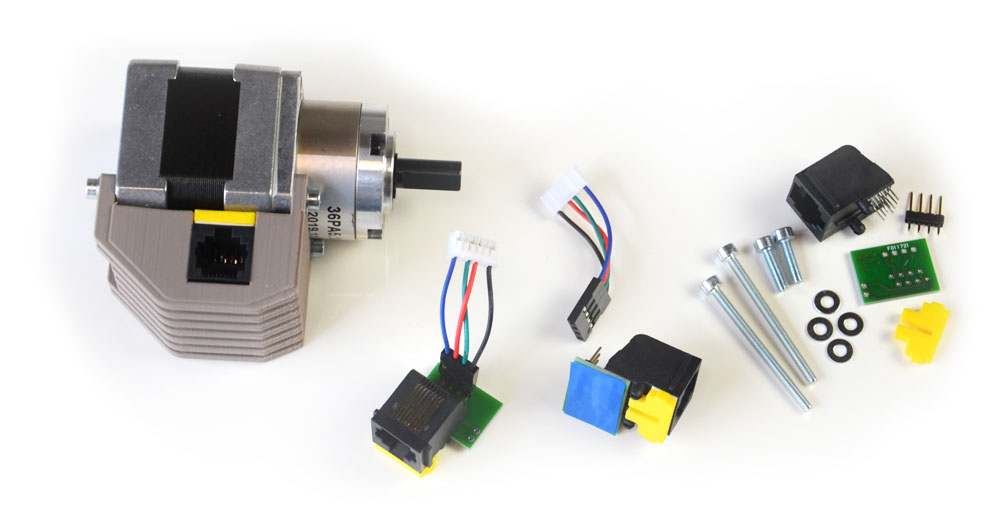
This is the place to be for answers. Basically there are three essential parts to the extruder + the cartridge.
- Motor part and socket housing
- Motor coupling to and auger screw
- The barrel boring
The Cartridge assembly is standard equipment.
You need tools to make the extruder.
- small wire cutter
- Philips screwdriver
- hex key for 3mm bolt
- old toothbrush
- small file
- soldering iron
- a 3rd hand.
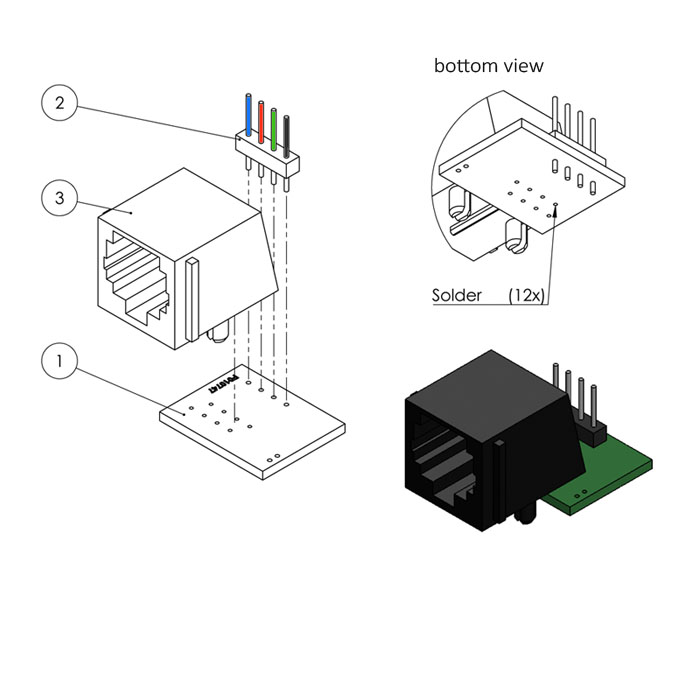
UTP RJ45 connector
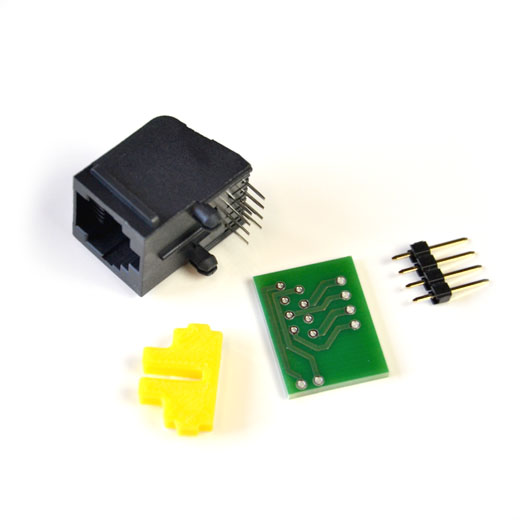
Retrieve the 7 parts for the UTP socket out from the bag.
- RJ45 socket
- Green pcb
- 4 row pin header
- Dupont 4P 50mm cable
- 10cm, 290˚C solder wire
- 2cm insulation tape
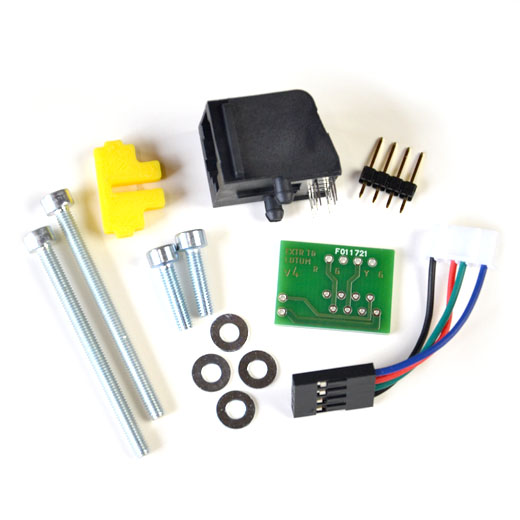
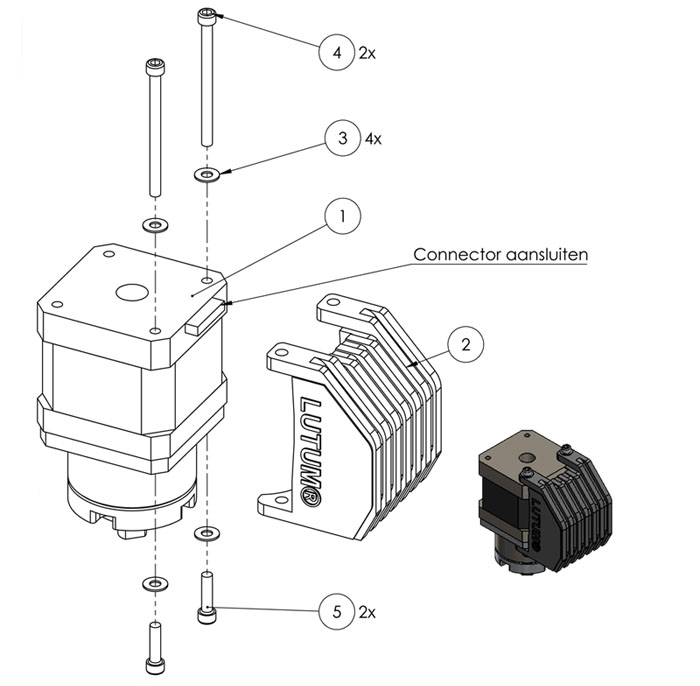
The other bits that are needed for the final assembly of the Motor part and socket housing:
- nema 17 geared stepper Motor
- Plastic housing with the word LUTUM on it
- 2pcs. M3x12
- 2pcs. M3x40 2pcs
- 4pcs. M3 washer
Soldering the RJ45 socket
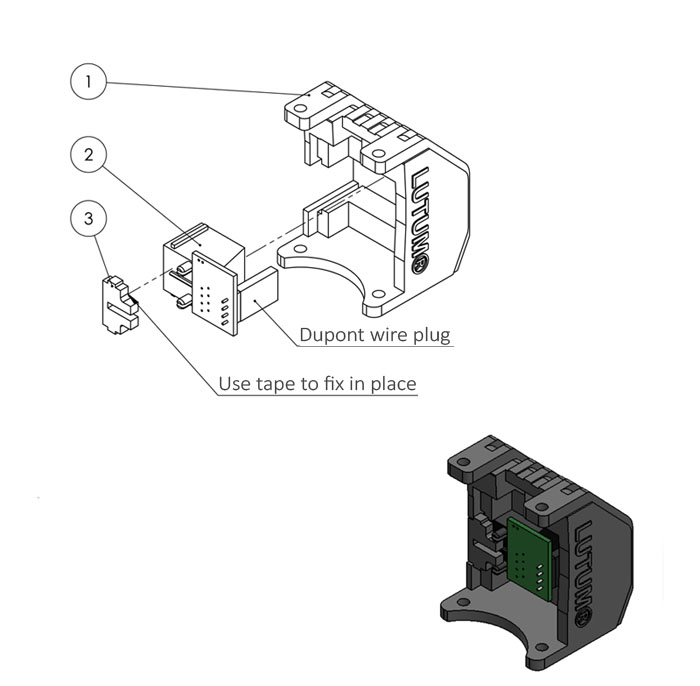
connecting the cover
Connecting to your hardware
All LUTUM extruders are connected with a UTP 68A cable and a RJ45 socket (8P8C) . Apply the following connection order using the T568B wire coding standard to drive your extruder.
Set step count to 836 steps per mm. this value will gives good results with standard 3mm nozzle ad 3mm filament configurations in your slicer.
