Questions about the Clay
 The power of material use is a combination of physical appearance, its mechanical properties and the solution it’s used for. Our favorite is stoneware clay. Stoneware is a type of pottery which is impermeable and partly vitrified but opaque. It is made from stoneware clay fired to high temperatures. It does not require glazing. Its water absorption is less than 1 percent and is greyish in color.
Stoneware is made from a natural occurring clay tape. It consists out of different amounts of kaolinate, mica and quarts. Impurities are present and the reason for the grey look of fired material. The base material is also known as ball clay.
“The name ‘ball clay’ is believed to derive from the time when the clay was mined by hand. It was cut into 15 to 17-kilogram cubes and during transport the corners of the cubes became rounded off leaving ‘balls’. The ceramic use of ball clays in Britain dates back to at least the Roman era. More recent trade began when a clay was needed to construct tobacco pipes.”[1]
The stoneware Vormvrij | 3D uses is Traditional stoneware. It can be fired twice if the end produce needs to be glazed. First burn is around 900 °C and called bisque firing. The second one, to form the layer of glaze on the product, called the glost firing, is around 1250 °C.
First examples
The earliest examples of stoneware have been dated back to at least 1900 BC at the Indus Valley Civilization. An industry of a nearly industrial-scale mass-production of stoneware bangles flourished there throughout the civilization’s Mature Period between 2600 to 1900 BC.[2]
Another early form of stoneware has been found in eastern China Zhejiang region at Deqing. From the various definitions of high-fired ceramics, it is agreed that these early brownish olive glazed stoneware products were from the late Shang dynasty ( 1750 BC – 1122 BC). Large quantities were eventually produced by the Han dynasty (202 BC – 220 AD).[3]
References: [1] wiki Ball_clay, [2] wiki Stoneware, [3] cultural china
No, and yes.
It’s as difficult as you make it.
Printing with clay is different compared to 3d plastic printing. In most cases you have to mix your own print medium and prepare your own clay cartridges to feed the printer.
On the other hand, once you have the clay, printing is quite straight forward. Simple designs, like basic tube shaped objects, are super simple to create.
yes, you can.
Most clay types need to be diluted with some water to print properly. There are many factors that dictate the correct viscosity for your project. It depends on nozzle size, print speed, ambient temperature, local humidity and the shape of the object you want to print.
There is a wide variety of clay mixes you can use. It’s best to follow the clay mixing manual that came with the printer and build upon it yourself.
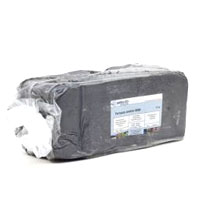
Pictured is dark earthenware pre-mixed with salt glaze.
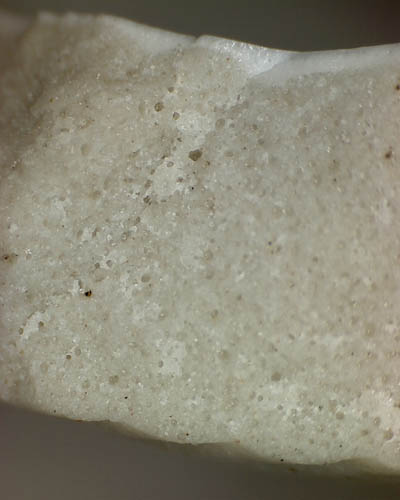
The best clay to start with is Stoneware (ball)clay with 25% grogg at 0.2mm. It is very easy to print and is workable with a very wide range of viscosities. Because you can fire this clay at vitrious temperatures the final object is strong as the different print layers have properly fused together.
Pictured a cross section chard of sintered stoneware with white glaze.
Some clay types, like porcelain clay need special treatment or a different Auger in the extruder.
Porcelain needs additives to get the right viscosity for printing. Because there are many varieties of porcelain we can’t advise on the right additives, you will need to research this yourself and create your own unique clay mix you can print with.
There is also the option to purchase premixed porcelain for 3dprinting from Imerys Ceramics. They have a line of clay formula especially for LUTUM printers.
You can choose different clay types like terra cotta or black earthenware for printing. Most of these types only need a small amount of extra moisture to become printable. You can also add pigments to get exotic results.
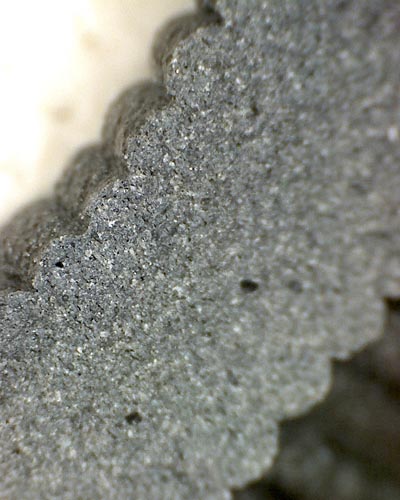
Pictured is a cross section of a chard of black pigmented stoneware clay.
Yes, any regular pottery post processing of greenware or bisque is possible with 3d printed ceramics.
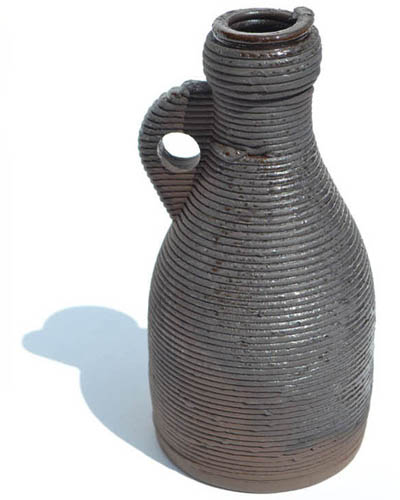
Pictured is a 3d ceramics piece that was lightly sponged after printing, then glazed with white glaze and partly sandblasted to make a matt surface finish.

Yes, 3d printed clay is still regular clay. Depending on the viscosity you might need to wait a few hours before your do any manual post processing.
Sometimes it’s good to print extra surface layers to make the object strong enough for post sculpting.
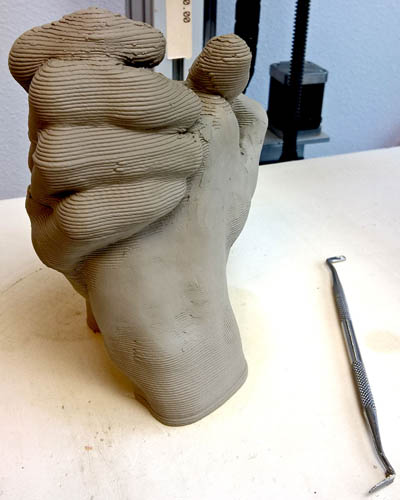
Pictured is a partially post sculpted 3d clay print.
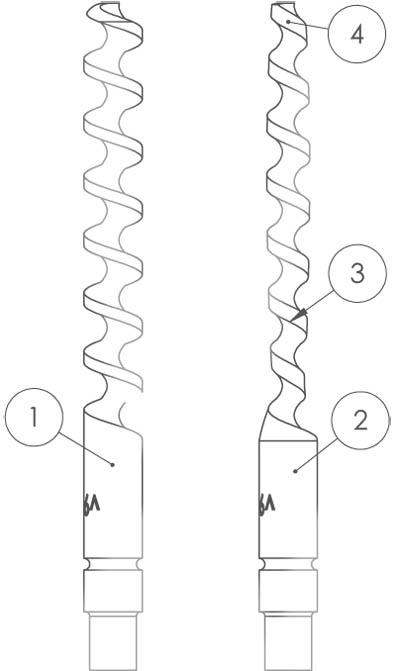
The new stainless steel augers [1] allow to print with grogged paste (0.2mm grogg at 25% mix).
However wrong usage can wear these augers realy fast. We offer specialty
Augers from hardened Maragin steel on request, they are over twice the cost of our standard Stainless steel Augers but the material is about 3 times as hard compared to our standard variant.
 There are some advantages to print with chamotte.
- You need less water to get the correct clay viscosity.
- The prints are stronger.
- The final objects shrink less in the kiln.
But there is a catch, use this clay improperly and the auger screw will wear to the point it needs replacement. [2] This is an expensive part so best follow the guidelines below.
With grogged clay you need to make sure there are no blockages in the clay flow. If there are, you need to solve the blockage, do not increase pressure or flow.
If there is a blockage at the tip, for example a build up of firmer clay than what’s in the cartridge;
this happens when the rotation speed of the auger is higher than the actual displacement/extrusion speed of the clay.
It will start to separate particles and water, water goes up, clay goes down and becomes more difficult to extrude.
To fix this you can increase the flow for more pressure. This is not the correct way, the auger will start to wear[3] as it grinds along the chamotte particles in the clay. Especially in the upper part where new clay is fed.
Eventually the soft slurry will move down and more of the screw can rotate while chamotte just hangs around.[4]
Over time it becomes worse as the only way to print is rotating the auger faster to debind the clay and push it out.
To solve this properly, as soon as you see that the extrusion speeds start to change during a print while the speed and flow of the machine remains the same:
- increase the pressure.
- clean the nozzle assembly up until the screw.
- before re-attaching the nozzle assembly extrude clay to refill the extruder with new homogenous clay.
- the rotation speed of the auger at moderate speed of 50mm/s with a 3mm nozzle should be around once every second.
You can print chamotte without wearing the auger significantly. Make sure the auger is not mixing, just pushing your clay down.
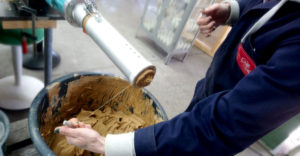
When you have purchased this part and after you unpacked the pugmill adapter you can attach it to the outlet of your pugmill.
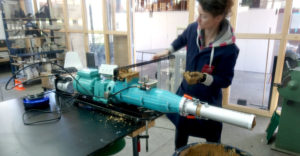 You have sent us the drawings of your machine, the connecting holes match, you just need to make sure one of the clamps of the adapter is pointing upwards as much as possible.
Once attached you can use the pugmill as you are used to.
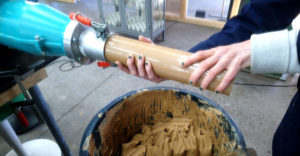
When preparing clay its best to keep the small PET cartridge and its aluminium holding tube attached to the Pugmill. That way you keep the inside of the adapter clean and you can check if your clay paste is the correct thickness to push into the cartridge.
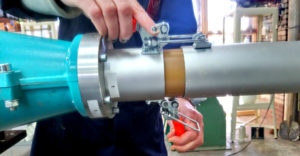 You probably need to calibrate the aluminium holding tube a little to have a perfect fit of the PET tube.
The clamps should hold the PET tight but it should not be too hard to close and open them. To adjust you can loosen or tighten the open cap at the end of the tube.
An effective way to prepare your clay is to cut and soak a couple of packages of clay in a large bucket of water for 24h. Drain the water before you start feeding the clay into the pugmill.
 Grab random pieces of clay from your bucket and feed them trough the pugmill. Repeat this for at least 3 times to get an even and consistent batch of clay.
Now you can fill the cartridges with the clay.
It helps to spray the inside of a PET tube with some water (a lubricant) just before you fill it. Make sure all the water is pushed out when the tube is filled.
When the tube is full, cut off the clay sticking out and remove the aluminium holder.
 Cut the clay again for a flat surface at the end of the PET.
Rotate the pet to seperate it from the clay feed and pull it out and away from the adapter.
Push a green disk into the smooth (cut) clay end, make sure the cap sits about 1 mm below the edge of the PET.
Cut the other end of the clay and cap both ends with a white PE cap. Store the clay standing up with the green disk on the lower side.