A short guide to print this well known 3dbenchy benchmark and test your printing skills.
Printing 3Dbenchy with clay.
A short video taken while printing the Benchy.
I finally printed the 3Dbenchy with our LUTUM® clayprinter. This was a lot easier than I expected but it did take some time to get the slicing parameters correct.
To slice the file I used the Prusaslicer version 2.2.0. At the end of this article I will give all links, the 3Dbenchy STL file and gcode files for your LUTUM® printer if you want to try right away. After downloading 3d benchy from 3dbency.com I noticed this object was very small. First thing to do was to choose my nozzle and layer size and scale the benchy accordingly.
The excellent features of prusaslicer allowed me to check the slicing result for difficulties with clay. I tried to get the critical vertical shells to print without any infill. This was particularly important in the upper section of the little cabin. The small window sides will wobble a lot and I wanted to keep the nozzle passing in those areas to an absolute minimum. I found the optimal Scale at 300%. However, as I saved the STL file earlier at 250% I had to scale it up in slicer to reach the desired size. If you slice this print yourself using the download from this website, please scale it 120%.
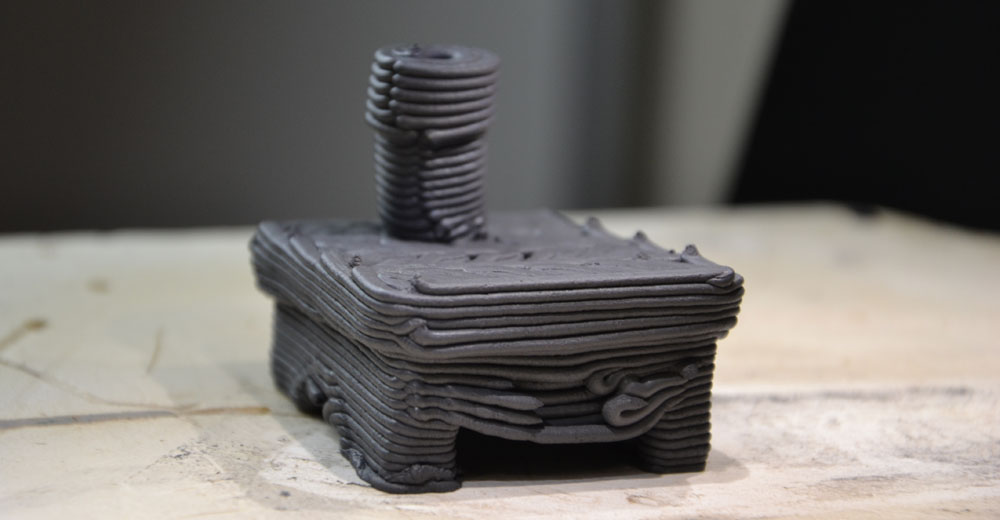
fig.01 testing
Next I tried to print the top section of the cabin a few times before starting the full print.
Getting the slicer settings and printer settings correct for that part of the print was most important as the rest of the print looked less difficult.
A little note on slicer and bridging parameters, the standard multiplier is 1 and that is way too much for clay. Try a few times to get it correct.
– When using the 1:3 ratio (layer height : nozzle size) I found the multiplier to be 0.65
– With the 1.25:3 ratio the multiplier had to be set to 0.5.
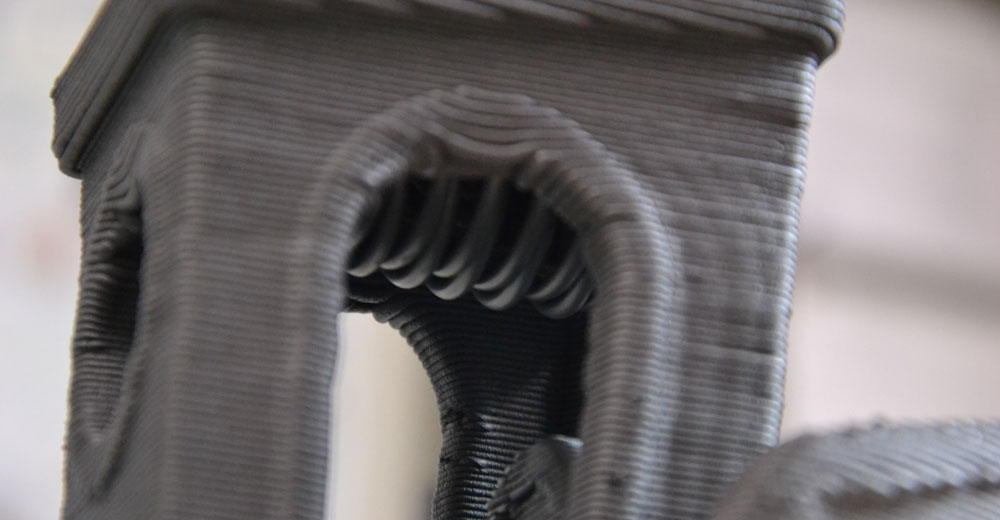
fig.2 pictured is the standard 1 multiplier for bridging
After getting all settings correct I set to print the file, this worked good enough but not perfect as the little window sides were still very wobbly during the print. In the end the print sort of solved itself but the result was a bit af a skewed chimney as the ceiling could not hold the weight of the clay above. A solution was to fix the file by introducing a small beam under the roof to hold the chimney. I also made a few connecting strands of clay between the little window and door sides to keep them a bit more in place, this works but is still not optimal. However, The result is very promising. (I had to lower the Flow to 50% from the standard file as I forgot to reduce the pressure to accommodate the 3mm nozzle)
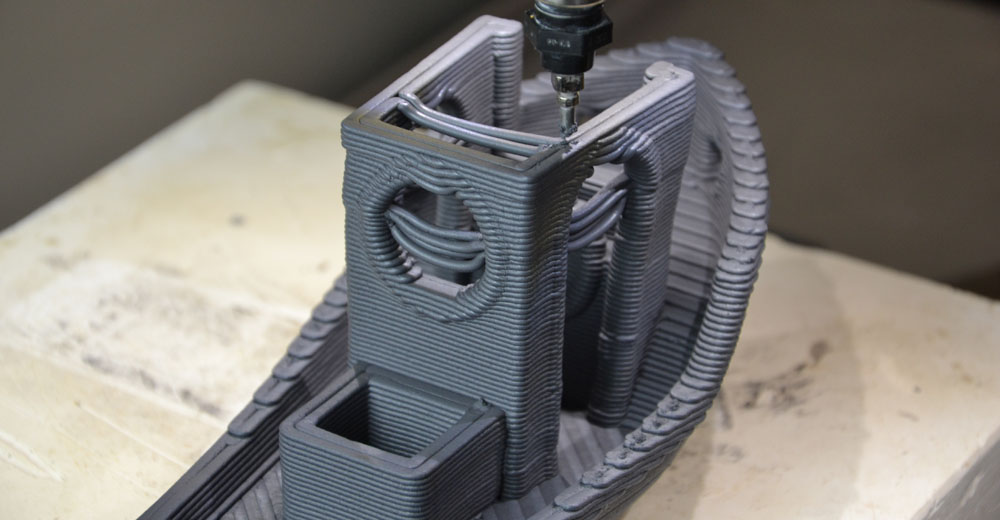
fig.3 STL file adjustments.
If you like to try this print yourself you can download the gcode files below. These files were sliced for the LUTUM pro+ and might stall your machine, if it does, lower the print speed with the control box until it prints properly.
G-code files for LUTUM:
If you like to slice this file yourself using the settings I found, you can download the configuration bundle. This can be imported into Prusa SLicer to take effect. Note that you might need to slow down the printer or lower printspeeds in prusaslicer if your LUTUM stalls or skips steps.
- download prusa configuration bundle
- Find the original 3Dbenchy files and other info about this little benchmark boat here